Mopar Radiator Fan Cooling Module Complete with Shroud; Wrangler JL & Gladiator JT

- Genuine Mopar Part
- Mopar 68272755 or 68282799
- Removed from Low Mileage JLs & JTs
- Includes Fan, Motor, and Shroud
Fits: 2018+ Wrangler JL, 2020+ Gladiator JT
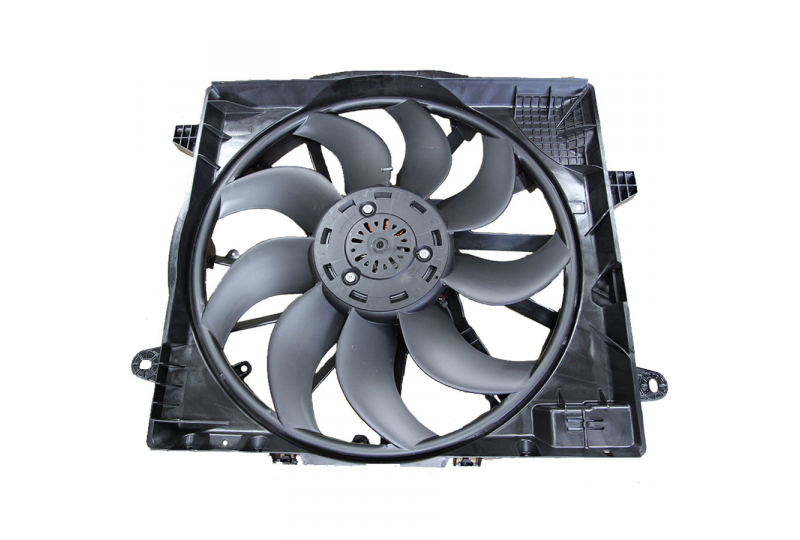
We do a lot of HEMI conversions & modifications on new Wranglers & Gladiators; because of this we often have factory parts in new or like new condition. This listing is for the Mopar Radiator Cooling Fan Module Complete w/ Shroud.
- Genuine Mopar Part
- Mopar 68272755 or 68282799
- Taken from Low Mileage JLs & JTs
- Includes Fan, Motor, and Shroud
Disclaimer:
We aren't suggesting this but if anyone is interested in this user's build, here it is. Mod at your own risk.
Posted by: ecidiego
I have no clue what e-torque is, 2.0L turbos....only follow my thread if you have the 3.6L the Gladiator has....the non e-torque 3.6L.
As always mod at your own risk. There are LARGE amperages involved here. You *MUST* ensure your fusing and the wires involved are rated for each other. Fuse protects the wire not the device.
PARTS:
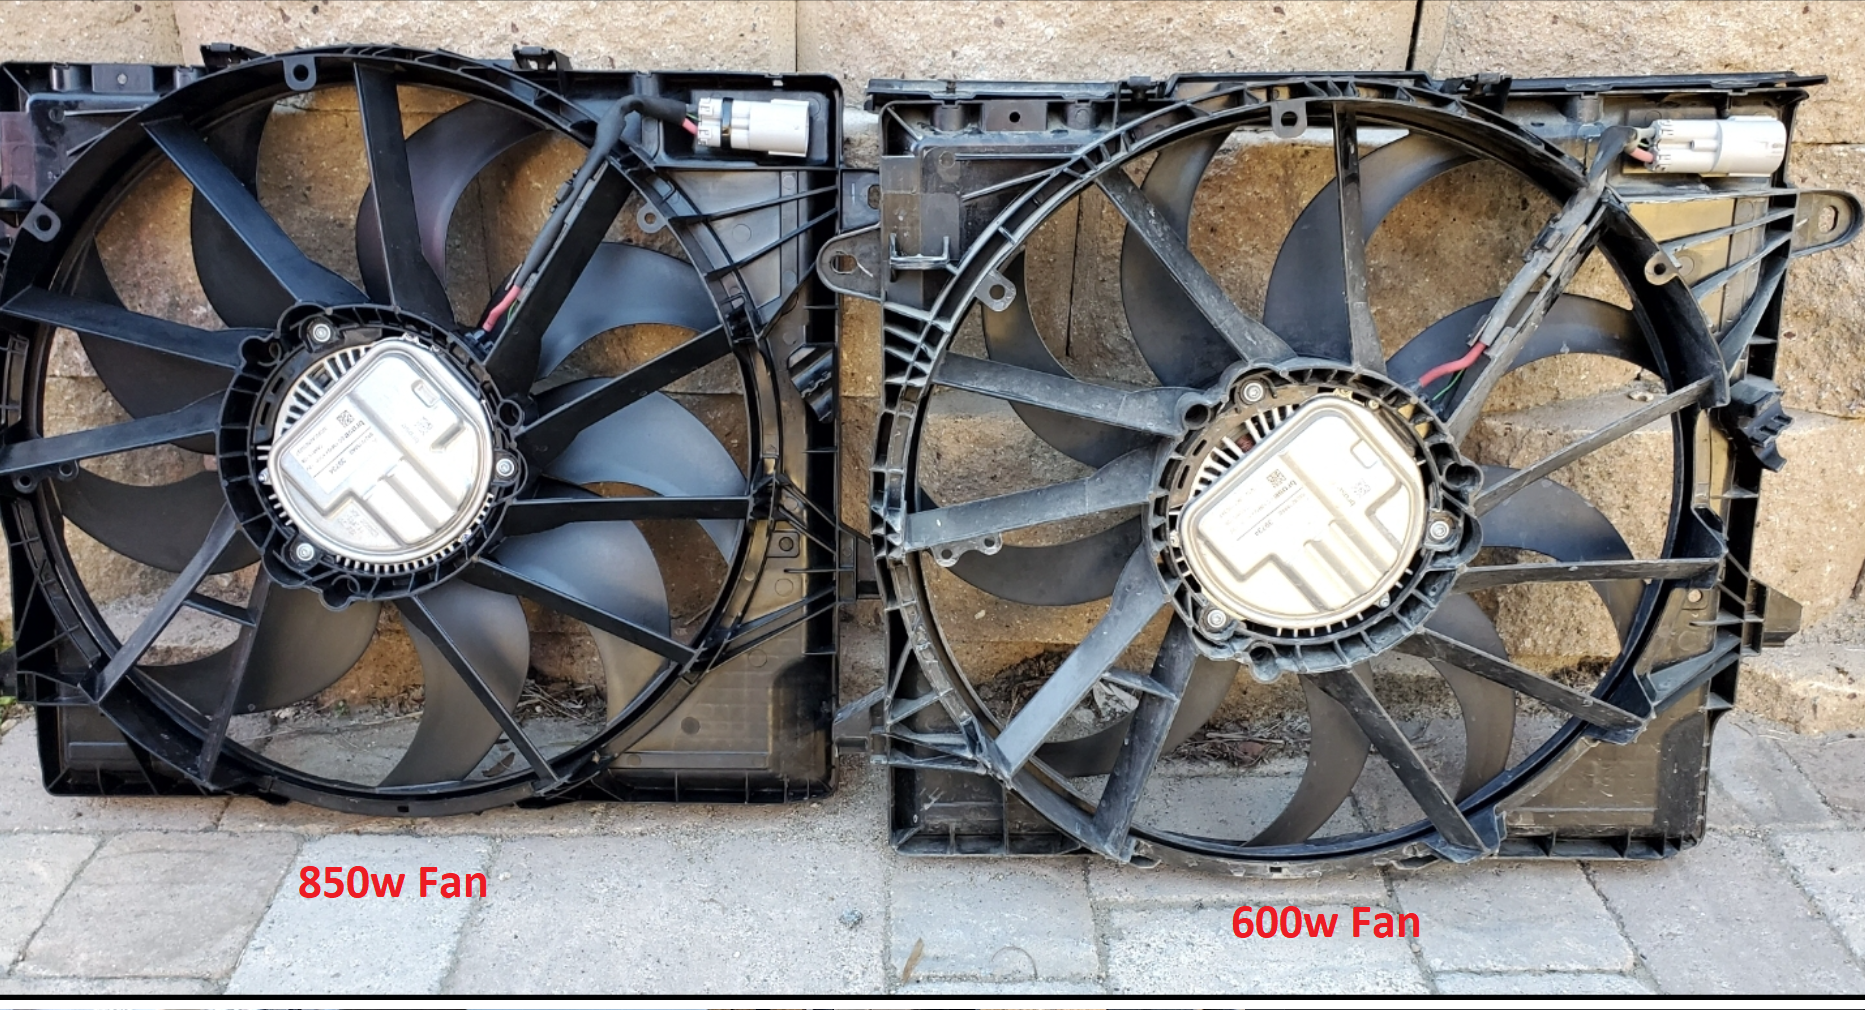
- MOPAR 850w Fan for JL and JT: 68272755AD
- MOPAR 240a Alternator for JL and JT: 56029803AA
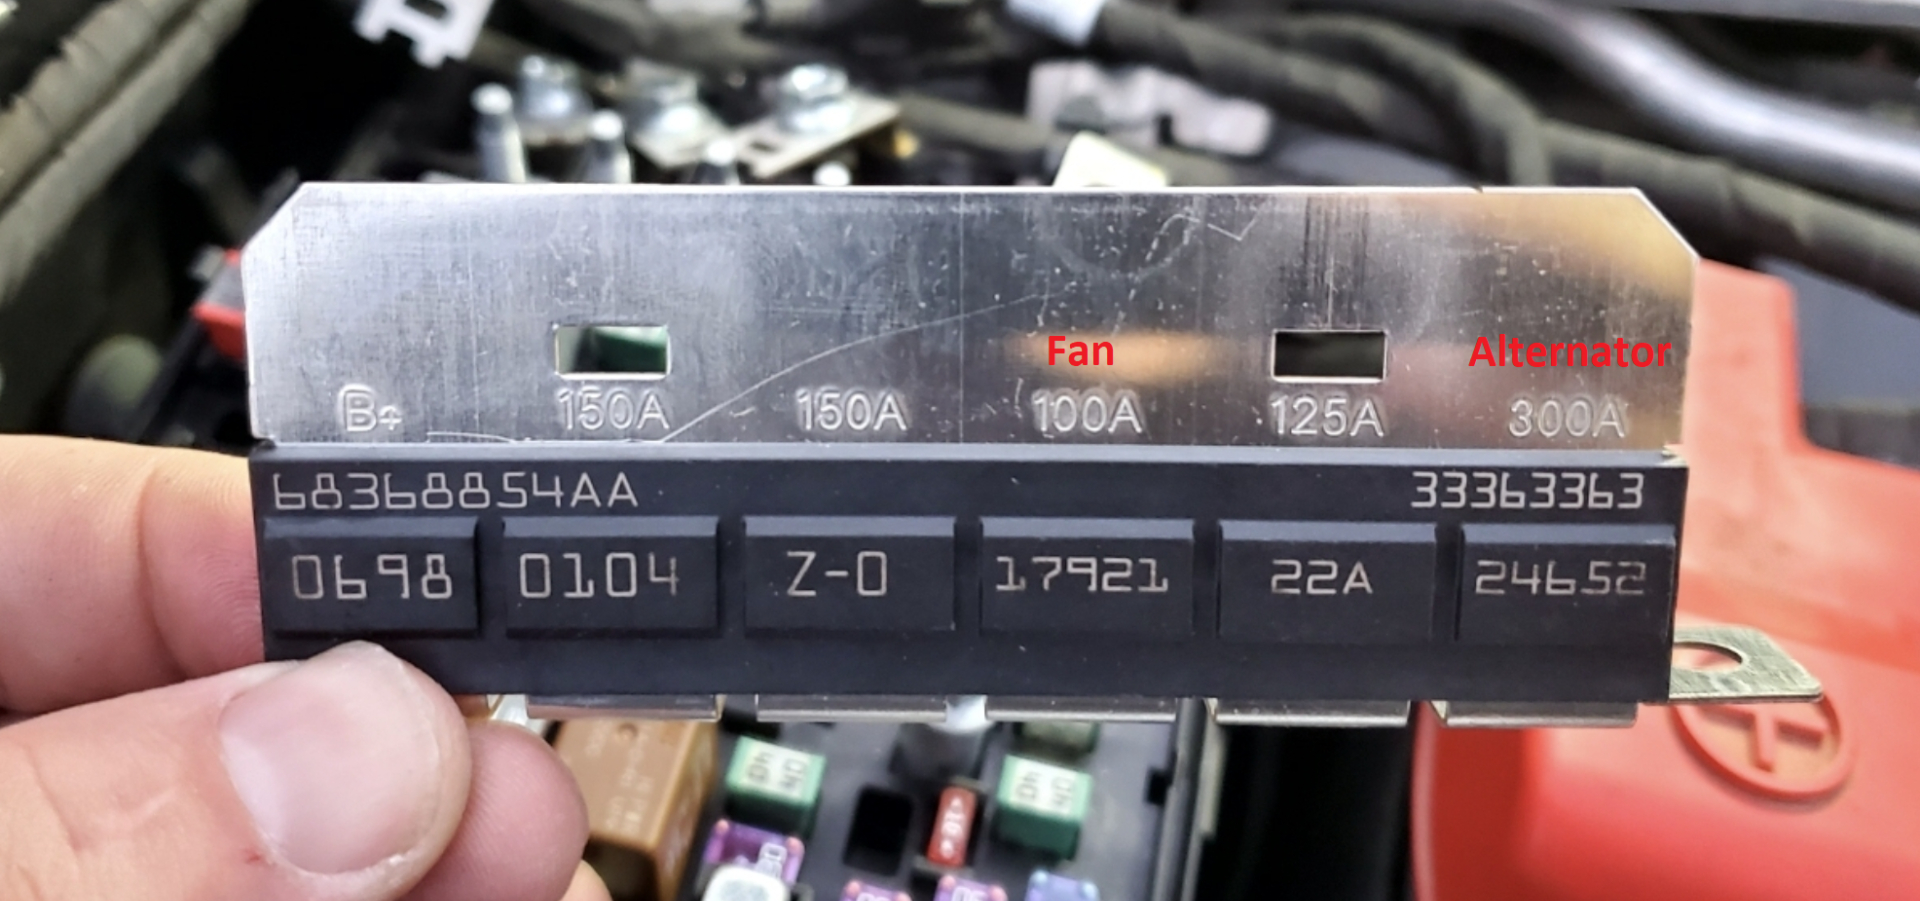
- MOPAR Z Case Fuse Array for vehicles with 850w fan: 68368854AA
You can get the fan for a steal here, pulled off trucks doing V8 conversions:
https://www.rubitrux.com/mopar-68272755-radiator-fan-cooling-module-shroud.html
Don't put the fan on a 180a alternator. While it may work, I was thinking that's a huge difference....180a to 240a in the tow package or aux switch package. I was about to buy a 240a but then realized I had a 220a....from the 8.4 Premium Audio package. I installed the fan and it's working fine with the 220a. There is no BCM config or ECU tuning involved. This is all wires and fuses.
Some things to consider:
Z Case Fuse Array:
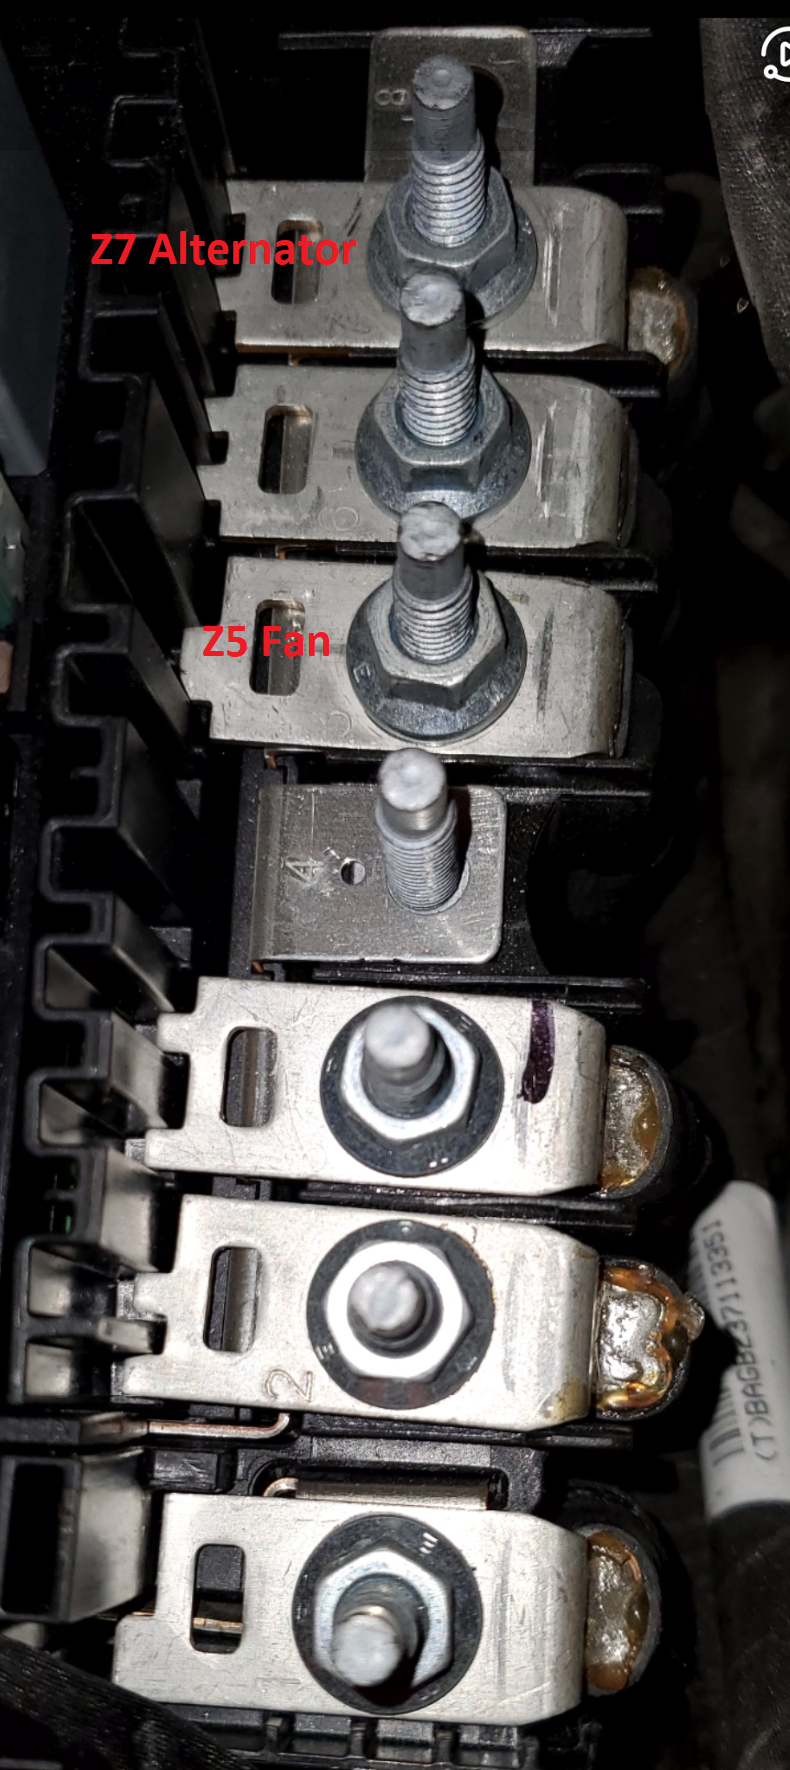
ALWAYS check your Z case fuse array on the PDC for 100a on Z5. ALWAYS disconnect and separate the battery grounds and fender grounds when checking this. You remove the PDC fusebox cover, remove all 6 cables, and gently lift the fuse array out. If you are uncomfortable doing this do not attempt this mod or ask someone to help you. If you have the 60a, you MUST replace this array with the 100a version. My 2021 had the 100a despite not having the tow package or aux switches. It's possible they all have it now but check anyway. If you have the 60a, you also need to make sure the wiring from Z5 to your fan is capable of 100a. Unknown if Jeep used a different harness here but if they did you need it. ALWAYS check for 300a on Z7. This will ensure you can handle all of the alternators available for the Gladiator. If you have something lower, you need to upgrade that harness too. I haven't seen anything but 300a here. Credit to ShadowsPapa for alerting me to check this. If your fuse array doesn't look like this, you MUST buy MOPAR part # 68368854AA and check your fan and alternator harnesses/cables :
Alternators:
- MOPAR 56029597AB 180a: comes with Gladiators missing all three of these: 8.4 Premium Audio, Aux Switches, Tow Package. Not good enough for the 850w fan....upgrade to the 240a.
- MOPAR 56029765AA 220a: comes with Gladiators with 8.4 Premium Audio but missing Aux Switches and Tow Package. I am using this with the 850w fan right now. No issues yet. If there are I will upgrade to the 240a.
- MOPAR 56029803AA 240a: comes with Gladiators with either the Tow Package, Aux Switches, or both. If you have the Tow Package you aren't reading this thread. You have the fan. All a factory Aux Switch truck needs is the fan and *possibly* the 100a Z5 fuse array.
The last character/letter in each part # often increments as revisions happen.
Cliffs:
- Always check Z Case Fuse Array for 100a Z5 and 300a Z7. If lesser, upgrade fuse array and check wiring to fan and alt...upgrade if necessary.
- If you have a 180a alt, upgrade to 240a. 220a, try it. 240a, good to go on alternator but for all 3 circle back to 1 above and check your Z Case Fuse Array for 100a Z5 and 300a Z7.
- Did I mention to check your Z Case Fuse Array for 100a Z5 and 300a Z7, and if lower, check both your Z5 wiring to fan and Z7 wiring to alternator?
Directions:
Tools: 8mm and 10mm socket and some extensions. Trim tool for the top 4 push retainers that mount the cover to the fan shroud.
- To be super safe, remove cables from main battery negative and separate them. Wrap with rags so they don't touch anything or each other. Remove body ground cables from fender. Wrap with rags so they don't touch anything or each other.
- Remove two 10mm bolts on top of the radiator cover that secure the air intake tube.
- Loosen the worm clamps at the air filter box and the throttle body. Pull air intake tube off at both ends and rotate 180 degrees, setting it aside by laying it on top of the PCM. You can leave the wiring and clips attached to it this way, you're just getting it out of the way.
- Remove air filter box. One 10mm bolt on passenger fender. Then wiggle it upwards. The bottom is just squeezed in with rubber posts. Set it aside.
- Remove the top plastic cover that hides the radiator and fan shroud. 4 plastic push pins. I pried the plastic up WITH the pin by putting the trim tool under the plastic trim, instead of under the push pin. Pop all 4 loose and out of the fan shroud, then slide the plastic backwards towards the engine and it will come out.
- Disconnect the fan connector, passenger side top. Press the release tab down (inwards) and pull apart.
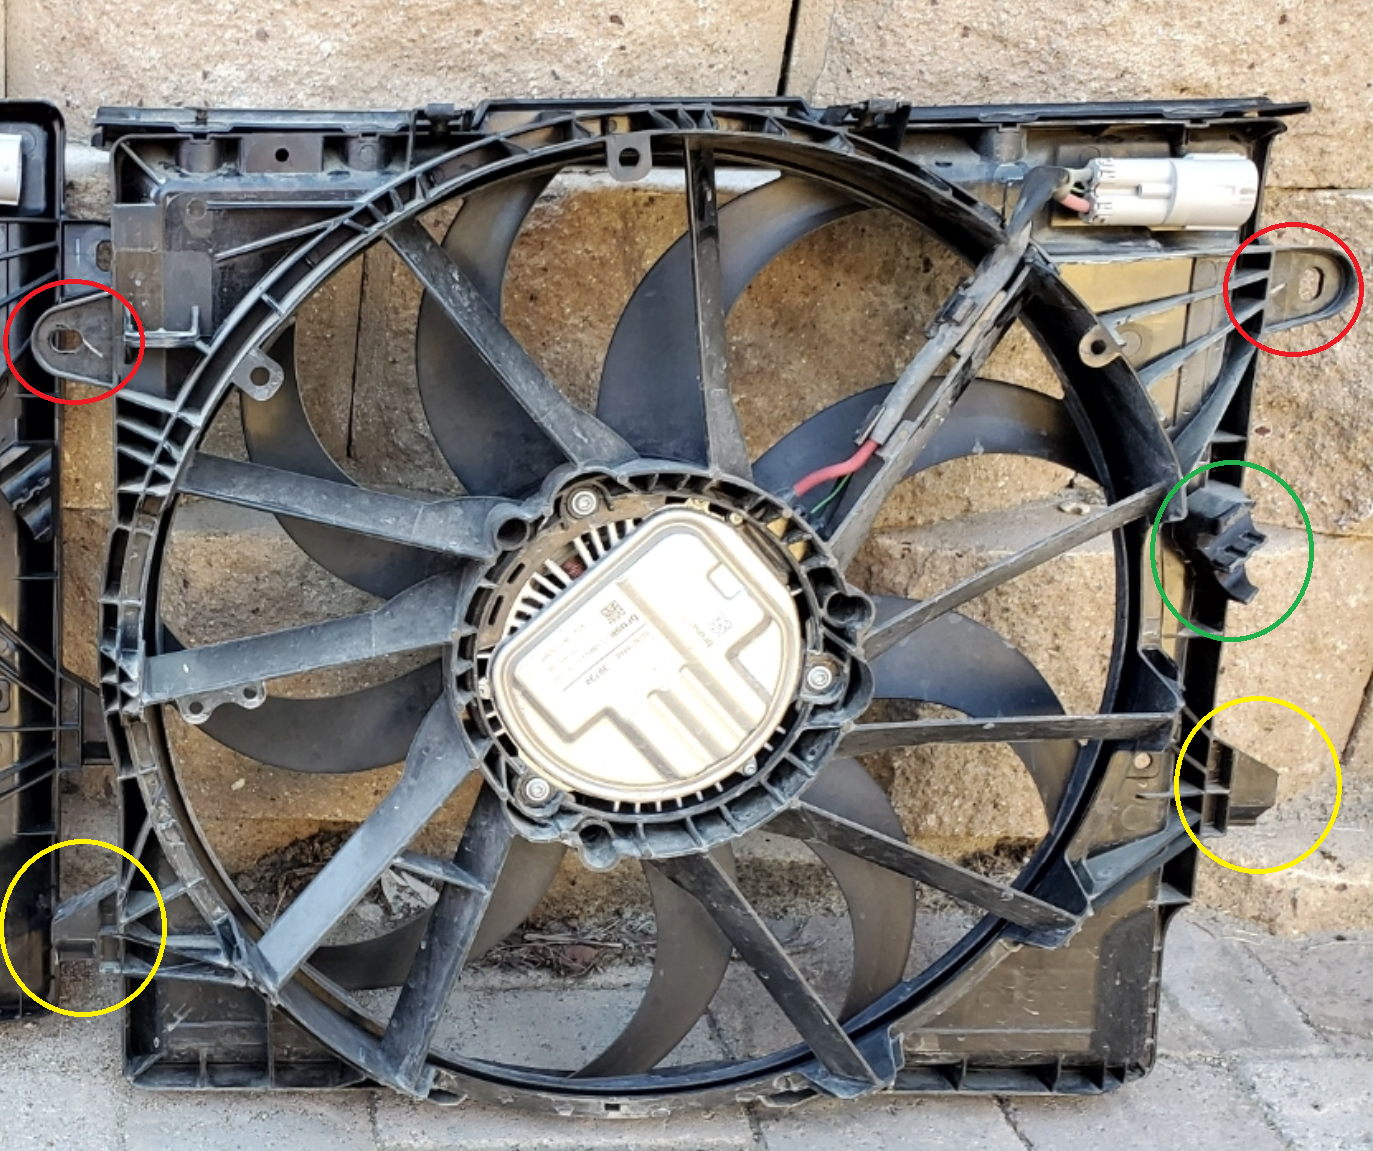
- Remove two 8mm bolts that attach fan shroud to the vehicle. They are near the top left and right sides. Red circles below.
- Lift the fan assembly up and out. While doing so, on the left you need to very carefully nudge the A/C lines out of the molded-in channel in the fan shroud. I didn't grab them right at the channel, I put my hand on them lower down, where they are braided. They seemed to move easier by manipulating them from there. If there is a lot of resistance, STOP. Don't break your A/C lines. Gentle. Gentle. Gentle. The channel is the green circle in the image below. You also need to bend the upper radiator hose on the right slightly outboard to clear the mounting tab there. Red circle on the left of the image below.
- Install is the reverse of removal. Make sure the tabs in the yellow circles of the image below slide into the "holders". Deal with the A/C lines carefully as you did on removal and get them back into the molded-in channel.
- Test for operation. My fan didn't turn on till about 160F coolant temp. Don't say "oh shit" when it doesn't spin on startup. Isn't supposed to.